Complete guide & Introduction to Aperture in photography

Tired of not getting a perfect shot? Don't worry we have your back. We will come up with numerous articles about photography in upcoming days which will definately improve your photography skills.
But for now, let's discuss the inevitable elements of photography that is none other than Aperture in photography.
The aperture in photography is the most important elements among the three i.e. Aperture, ISO, & Shutter Speed. It covers many variables whereas it affects the number of factors in the photographs. The use of Aperture can add dimension to your photographs by making it blurry on the background. On the other hand, it is also helpful to alter the exposure of the images by making them brighter or darker.
Well, above were the few things that you can do by setting the right aperture settings. Read till the end, we will cover everything that you need to know about Aperture.
What is Aperture in Photography?
In a simple word, Aperture in photography is a whole within a lens, through which light travels into the camera. To be more generic, you can relate the Aperture as your eyes iris that shrinks and expands controlling the size of your pupil.
Just like your eyes pupil, you can shrink or enlarge the size of the aperture to allow less or more light to reach your camera sensor.
If you are looking for a technical definition of Aperture then, it is defined as "The opening of a lens through which light passes to enter the camera".
I believe now you know what Aperture in Photography is? Now, let's jump into how Aperture affects the exposure.
How Aperture affects the Exposure?
Aperture is all related to the lights, so it will definitely affect the exposure. Aperture settings are very important and crucial when it comes to the brightness or exposure of the image.
If you can master in this, you can definitely click the better shot.
Let's continue with how aperture affects the exposure.
Aperture has its own sizes from high to low and it can change the sizes depending upon the amount of light that reaches the camera sensor. When more lights pass to the sensor, it is called as the large aperture (a wide opening) and results into the brighter photographs.
Whereas, Small Aperture is just the opposite of Large Aperture. It will let the camera sensor to let in narrow or low lights and results in the dark photos.
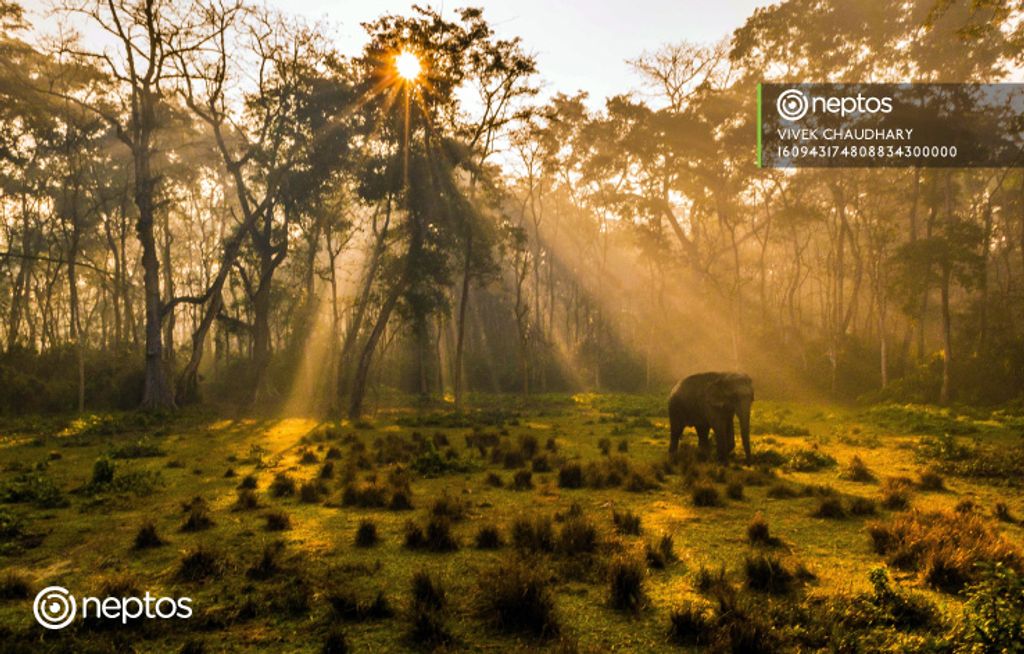
Look at the below examples to see how it affects the exposure.

In the above image, the large aperture seems to fail while capturing the shot at day-light. Whereas, a small aperture is too thin to capture the light and gives the low light photographs.
Similarly, when it's dark or if you are fond of night photography, try to go with a large aperture.
Aperture and Depth of Field
In order to understand the relationship between Aperture and Depth of field, at first, you need to about Depth of field?
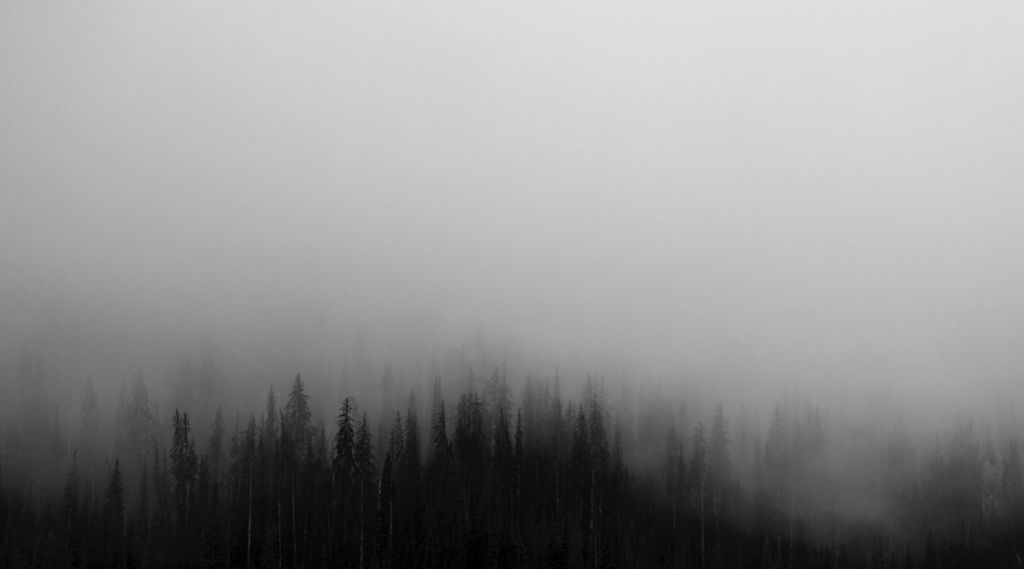
The depth of Field is simply the sharpness of your photographs from front to the back. Some images consist of a thin or shallow depth of field having the background completely out of focus. While some images have a large or deep depth of field where both the front and background are pretty sharp.

Look at the above image, it has the sharpness from back to the front.
Another way to remember the shallow and thin depth of field is the amount of blurriness in the photos. Large Aperture results into a large amount of blurriness in the background. However, the concept of depth of field might be different in portraits or bokeh photos and can have the sharpness at the same time.

The depth of field can be created on the image on the basis of its types and nature. The use of high aperture results into wide blurriness and small aperture results into small blurriness. The use of small to high aperture all depends on the genre and types of photography.

For instance, this picture is of landscape or architectural on nature. We can find a small amount of blurriness in the foreground and background being sharp at the same time.
So, next time when you experiment with small aperture and large aperture, don't forget to create the depth of field. Be experimental with your gears, the more you are familiar with your gears, the more you feel comfortable working with it.
The secret of F-Stop and F-Number
So far, we have known the apertures as small aperture and large aperture, but it's more than that. Let's dig in more with Aperture.
Every aperture is expressed in numbers i.e. "f-number" or "f-stop".
Next time, if you see something starting with "f", be clear that it's aperture. You may have noticed something that looks like f/2, f/3.5, f/8 and so on. If not, you may have noticed numbers like f2, f3.5, f8 and so on. Well, these both things are the same.
The way of showing aperture in camera devices varies. Some indicate the f-numbers while some omit and use the short forms f-stops.
"F" denotes the aperture and the number or stops indicates the small aperture & large aperture.
Small Aperture vs Large Aperture
In general terms, Small represents the smallest or few amounts and largely represents the big amount. However, it's just opposite here. A small aperture is indicated by the large numbers i.e. f/11. On the other hand, a large aperture is indicated by the small numbers like f/2.8
It's a confusing thing, but you need to get very attentive here. Many young photographers often find this confusing and irritating. It's just the way it is, we can't do much rather understand the terms.

Take a look at this image. This is the size of the aperture from the front view. As you can see, f/2.8 is the smallest number and has the larger opening of the sensor. Whereas, f/16 is the highest number here and has very little amount of window opening.
So, next time when you think about large aperture, come up with small numbers like f/1.4, f/2 or f/2.8. And, a small aperture with numbers like f/16, f11 or f/8.
How to choose the right aperture?
Now, you have the concept and idea of how aperture works. But the question remains, how to choose the right aperture?
To understand and go with the right aperture, you need to go back to the depth of field. See, it's all connected and comes together.
Look at this amazing piece of pineapples in small aperture and large aperture settings.
 Source: www.photographylife.com
The first pineapple has the f/2.8 aperture and is brighter than all the above pineapples. More brightness indicates the large opening of the camera sensor, which will allow the camera to absorb enough lights. Now that results in the bright photographs.
Look at the last one with the aperture setting f/16. It has dim light and results in the photograph pretty dim and dead.
 Source: www.photographylife.com
This can help you think wider about the aperture in photography.
You may have noticed something different on the image clicked on the daylight and night time. The use of small setting f/2.8 (large aperture) captures enough lights and gives the perfect night shot. Whereas, the other setting has captured the image with low lights.
As we recall the depth of field, the shot taken with f/2.8 has high blurriness in the background. This type of setting is useful while clicking the shallow focus portraits. Meanwhile, the aperture settings like f/8, f11 or f/16 have captured the sharp details in both the foreground and at the background. This kind of setting is useful while clicking the landscapes.
 Source: www.photographylife.com
Let's sum up all the things that we have learned so far.
How to set Aperture settings?
You now know what to do with aperture. I assumed you are as excited as we are to use the aperture settings and capture the amazing shot.
Just have a little patience, you need to know your gear as well.
Aperture sign is denoted with "f-numbers" or "f-stops" in the camera's LCD screen. Whereas, the camera indication is a little different. To use the aperture setting, you need to put your camera from auto mode to "Aperture-priority" mode or "Manual" mode.
Aperture-Priority is denoted with the letter "A" in most of the camera models. On the other hand, some uses "AV" as Aperture. Whereas, Manual mode is denoted with the simple letter "M".
If you wish to use Aperture in "Aperture-priority" mode, just set it to "A" or "AV" mode in your camera. The camera will automatically select the suitable shutter speed for you. However, you have to set both Aperture and Shutter Speed manually in Manual Mode.
Maximum and Minimum Aperture of Lenses
Now, this all depends upon your gears or camera. Every camera has a specific maximum and minimum apertures. Well, these terms are important as it showcases the performance of the camera.
Generally, Maximum aperture matters as it simply tells us how much light the lens can capture at its maximum setting. In other word, it defines how bright your camera captures the shot at dark environment or in low lights.
The lens with the aperture setting of maximum f/1.4 or f/1.8 is considered to be a "fast" lens. It's because it can pass more lights than the lenses with the aperture setting f/40. Likewise, it can give a brighter shot and is expensive in nature as well.
Most of the cameras with modern lenses come with the minimum aperture setting of f/16. This is quite enough for day-to-day photography and you rarely need to go beneath the setting f/16.
At the end
Aperture plays a crucial role while shooting the eye-catching shots. You need to have a clear understanding of each and every term stated in this article. Whether it's the depth of field or the small aperture and large aperture, you need to know how these all works work together to create the perfect shot.
Besides, all these there are tons of other things that you can do with the use of aperture settings. We will discuss other elements in upcoming days, but for now, make sure you understand Aperture in photography and you're all ready to be experimental.
Feel free to buzz us, if you have any confusion on the above piece. We would be happy to help you in any manner.
6 Pro Tips to level up your Travel Photography
Stock Photography - Understanding the Client Needs
How to get sharp and non-grainy photos in low light?
Subscribe to Our Blog
Stay up to date with the latest marketing, sales, and service tips and news.
Comments(0)